
Shipping Artwork: Tips for Artists
I had no idea how to ship my artwork when I started my online store. There were too many variables and things that could go wrong. Should I ship my artwork internationally or just domestically? How much should I charge my customers? Where will I get my shipping materials? How much will shipping cost me? What size canvases can I ship before running into oversized charges? Which carrier do I use? Should I buy insurance? What if something goes wrong with a shipment? How do I handle returns?
I’m here to tell you that shipping doesn’t have to be scary. There are a few simple things you can do to make sure artwork arrives safely and customers are happy. Here’s how I do it:
A Beginning Artist’s Guide
First, All Sized Businesses Need to Keep Costs Low
When I first started selling through my simple SquareUp store, I only sold pieces sized between 8”x10” and 11”x14” and I only sold within the United States. Starting with the small sizes meant I could easily find boxes to fit these pieces and keep shipping prices low. Both with materials and shipping label costs.
I found an Amazon box in my recycle pile that fit the largest canvas size I offered in my store, and I created a sample shipment to weigh, and then I input the dimensions and weight into the USPS shipping calculator to have an idea of what the cost would be on my end. Then I passed that charge along to my customers through the shipping settings in my online store.
Once I started to consistently have 2 to 3 sales in my store a week, I purchased a bulk bundle of boxes so I’d never have to stockpile random Amazon boxes again. Since the max canvas size I offered in my store was 11″x14″ I picked one size box that would work for all of my shipments and wouldn’t leave too much empty space for the smallest pieces.
What Supplies Do I Use?
If you’d like to see all the supplies I use for shipping, click on the button below to be directed to my Amazon Affiliate page where recommended products are neatly organized. *I earn a commission if you make a purchase, but this helps fund the content on this blog, so thanks!
After a few months of sales, I was able to start offering larger sizes and could afford to spend more money on shipping supplies up front. I also offered flat pieces and found bulk rigid mailers that didn’t cost much to ship.
How I Package My Artwork Before Shipping
The main goals you should have when preparing a piece for shipment are:
- Keep the artwork safe.
- Lower your costs.
- Keep your customer happy.
- Make things personalized and attractive.
Flat Paper Pieces and Prints:
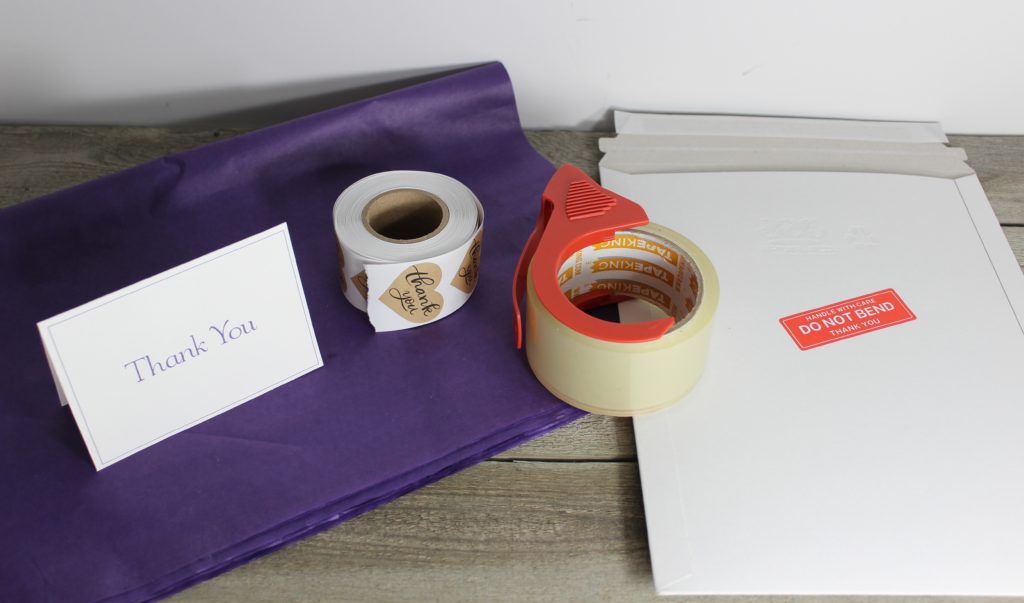
These are super easy to mail. Get a flat mailer. Seal your art in a poly bag. Include packing slip, thank you note, and coupon/next purchase promotion. You can also use a thin piece of cardboard to give your art more protection and rigidity during shipping. Affix shipping label and “Do Not Bend” stickers to the outside.
If you work with large pieces, you may consider using shipping tubes and rolling your art. I’d recommend using a poly bag to seal your art before rolling.
Canvases:
Canvases take a little longer for me to package, but here’s my process.
- Inspect the items ordered and then wrap each canvas in a sheet of thin plastic. Securing the flaps with clear tape. (You can also use self sealing poly bags.) This helps protect the art from moisture and keeps anything from sticking to the surface of your art.
- Use cardboard over the surface of the art to protect it. If you are packing multiple pieces in one box, make sure to add protection between each piece. If the contents of the box shift during shipment it’s possible one canvas could damage another. I usually secure the cardboard to the plastic wrap around the art with packing tape. (Cutting up recycled boxes to use as cardboard sheets.)
- I use crinkled up brown kraft paper to serve as a cushion for the bottom of the box and on top of the art. I’ve also used recycled air bags and bubble wrap from my personal shipments.
- Once the box is full, close the flaps and give the box a shake. Does the art shift and move easily? If there is a lot of movement within the box, I add more packing material.
- Seal the box with packing tape. Now you’re ready for your label.
Supplemental Material Included With All my Shipped Art Orders
Regardless of the shipping method or product type, all my orders include a few extra things:

- Packing slip (if you use an app like Shippo, it will generate a slip for you from your online store. Etsy also generates packing slips. You can use an invoice as well. Just make sure there is a document with the customer’s name and address in the package in case the outside label gets damaged.
- Thank you card- always show gratitude when your customer buys something. You never know who will be a repeat customer. They are supporting your business and it’s important they know you appreciate it. I hand write a note with each piece I send out.
- Coupon/Loyalty Rewards- Give your customer a reason to shop again, like including a coupon code with each order.
- Depending on the order size or if the customer is a repeat buyer, I will often include an extra gift.
Shipping Labels:
Once your art is packaged, it’s time to get a shipping label. There are two main options that I have used.
Option One: Hand write or print the customer’s name and address on paper and affix with tape to the box. Have USPS weigh, measure, and print postage label at the post office. This option sucks when you have a lot of shipments and I quickly transitioned to the next option.
Option Two: Use a shipping app like Shippo. Weigh and measure the shipment, and print your own labels at home. Then, drop the package off at post office or schedule a pick up a day in advance.
Option two is my preferred method. You’ll need is a kitchen scale and a tape measure for accurate shipping rates. You can even use adhesive labels to make things super easy.
Shippo
When I upgraded my online store to Weebly, I chose to use app integration and picked Shippo to simplify my shipping needs. At the moment, you can enter orders manually and print a label at home if you do not have an ecommerce store that can be integrated with the platform. If you use a more robust online store, it will likely have shipping label features built in.
Customer Service:
A positive interaction with a customer during the shipping process is crucial for growing an online business. Try to ship your items within 24-48 hours of the placement of your order and ALWAYS give your customer a tracking number and carrier information.
You should also write a Return Policy and include this somewhere in your store. I include a link to my policy on my receipts and order confirmations. If you plan on selling your art, it’s good practice to have a plan in place for accepting returns. Figure out your policy before to save headaches later.
You may also want to consider following up with your customer once the order arrives to see how things are going. I watch all of my orders on my Shippo dashboard to make sure all packages are delivered. If the shipping status isn’t updated for a while, I reach out to the customer to verify they received their item.
Shipping Supplies I Use:
Again you can find most of these items on my Amazon Affiliate page. Any purchase you make earns me a small commission that helps continue funding this blog. So thanks!
- Kitchen Scale (If you ship orders over 13 pounds, consider a bigger digital scale.)
- Tape Measure or Ruler
- Bulk Packing tape or Single Rolls
- Packing materials: I use thick brown kraft paper like this.
- Material to protect the art (I wrap mine in thin plastic. Or I save the plastic my canvases come wrapped in and use that during shipping.)
- Boxes (I researched boxes on Amazon or saved boxes from my personal shipments.)
- Hard mailer envelopes for prints and flat pieces:
- “Do Not Bend” stickers
- “Thank you” stickers
- Tissue Paper
- Shipping Labels for printer
- Clear Poly Bags
Tips and Things to consider:
Keep it easy and cheap:
- Again, don’t immediately try to sell and ship a variety of sizes online. This means you will have to work harder at sourcing boxes to fit each sale. If you take my approach and buy a bundle of boxes that can fit one or two sizes then you can be more conservative in your investments instead of buying a crap ton of sizes that you have no guarantee of using right away.
- Hoard boxes and packing material if you frequently order things online. I have a box of random supplies that I pull from for large shipments. It’s a good way to recycle AND save money.
- International Sales: Your costs will be higher, transit times are longer, and your customers may have to deal with customs charges, but the USPS labels are very easy to use and Shippo fills most of the details out for you. Etsy makes international orders really easy as well.
Insurance:
- Insurance: I personally insure all international orders, and some of my domestic orders through Shippo’s Shipsurance. If you use Priority Mail, this often includes insurance up to a certain amount. Ask yourself if you can afford to lose the entire amount of the shipment if something goes wrong and you need to refund your customer’s money. If not, insure the package. I personally have dealt with two insurance claims in the 5ish years of shipping.
Shipping Costs:
- Pack, measure, and weigh a sample piece of art to get accurate shipping costs before putting an item for sale online. You don’t want to be surprised by shipping charges and lose all of your profit if you assume you can ship a 36”x48” canvas safely for $30. You can’t.
- Always check your shipping costs for a new box size before ordering in bulk.
- Use the smallest boxes you can for each piece to avoid paying dimensional label costs on empty space.
- Try out the shipping rates with other carriers like UPS or Fedex. I found that for my smaller pieces, USPS was more cost effective.
- If you only work with large pieces, consider reaching out to LTL freight companies for shipping quotes. Or you can look at taking canvas off of the stretchers and shipping the rolled canvas in a tube. But this would force customers to spend time and money on re-stretching the canvas. I have shipped as large as 36″x48″ using Fedex and have been charged around $220 as my highest fee. I don’t offer these sizes often online.
- If you are setting up shipping rates for an online store, consider looking through the USPS PDF below to get an idea of costs around the country and internationally depending on weight and size. This is what I used to calculate my current shipping rules in my store: https://pe.usps.com/cpim/ftp/manuals/dmm300/Notice123.pdf
- Some states require you to collect sales tax on shipping charges. Check into your local sales tax laws for details.
***
And that’s all I’ve got. This is my way of shipping artwork. I’m sure every artist does things a little differently, but as long as you ensure your art is safely packaged and can survive the aggressive journey most boxes take during the shipping process then you’re good to go.
If you have additional shipping questions, I am happy to answer. I tried to include all of my knowledge, but I may have missed some things. Please leave questions and comments below while commenting is open or reach out to me directly through Instagram or email. I’d love to hear from you! Make sure to sign up for my email list below to never miss a blog post.
-Kelly
P.S. You probably know by now that I am here to help artists with these posts. If you need help with your online branding, Instagram account, or just want a creative accountability coach, then check out my consulting services. You can easily add a session to my online calendar now.