A little over a year ago, I bought myself a pigment printer to make prints of my artwork at home. I shared all of the supplies I use in this post, but I only glossed over how to actually photograph your art and edit your photos for printing. And after getting a request for a more detailed blog post on the topic, I figured it was about time I share more details of my process. (I love when you guys ask me questions and give me ideas for future posts. Keep ’em coming!)
Now, I am not a photographer. I do not know everything about camera settings and perfect color correction in editing, but I’ve done a fair amount of trial and error and have a system that works for me. If you are considering making your own fine art prints, there are quite a few things to think about to determine how to photograph my art. Like–
How Big Will Your Prints Be?
I stressed out about this a lot before I started making art prints. I wanted to know how big I could make my prints without losing quality. There are a lot of resources online to do pixel math, but this link has a pretty clear way of explaining the print sizes you can get depending on your camera’s megapixels.
My camera takes 24mp photos, and I want to print at 300 dpi (dots per inch) for the best quality. I only make prints as large as 11″x14″, but I could go as big as 13″x19″. I could go even bigger if I was okay losing quality, but I like to put my face about 3 inches from the print and still be able to see crisp details, because I’m a fricken weirdo.
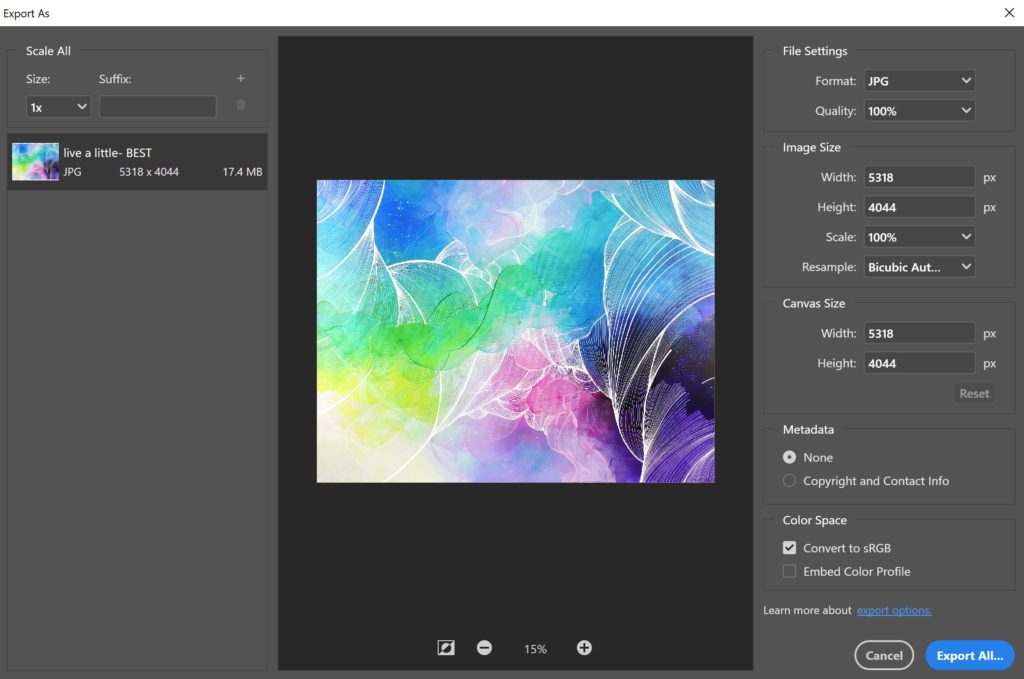
The site I linked above has an easy formula to see how big you can print. Simply take the width and length in pixels of your photo and divide each by 300 dpi. My latest print file is 5318×4044 pixels. So 5318/300 is 17.72″ and 4044/300 is 13.48″. That’s as big as I should go with that particular print to maintain a 300 dpi quality.
I’ve been very happy with my print quality so far. (Also, I stick to 11″x14″ or smaller to make shipping cheaper and more convenient.)
The Equipment I Use:
*Links contained in this post are affiliate links for Amazon and I will earn a commission if you make a purchase, at no additional cost to you. These commissions help fund more content like this, so thanks for clicking and buying stuff! You don’t even have to buy the items I recommend in order for me to earn a commission. Just click a link and buy things you need. (Sweet!)
DSLR Camera:
I used to use a Canon Rebel T3i, but I upgraded to this Canon Rebel SL2 in December 2018 because I can take bigger photos with more detail. Any high quality camera will work for you depending on the size of print you want to make. Just look at the megapixels and compare to the above Designs215 link to determine what’s right for you. I use the standard 18-55mm Canon lens.
Tripod:
You can hold your camera if you have a super super steady hand, but to eliminate any camera shake, I use this tripod.
Diffused Light Soft Boxes:

You do not want harsh light on your work when you are taking photos. Especially if you work with glossy materials. Last year, I bought these Geekoto soft boxes, but they appear to be unavailable at the moment. I haven’t tried this Mountdog soft box, but it could be a good alternative.
Basically, get two soft boxes that use daylight bulbs (5500k).
Flatbed Scanner:
When my work is 9″x12″ or smaller and not glossy, I simply scan at 600 dpi using the scanner on my Brother 3-in-1 printer. If you are going to buy a scanner, do some research. Mine isn’t by any means the best, but since I already had it at home, I figured why not use it.
How I set up my equipment:
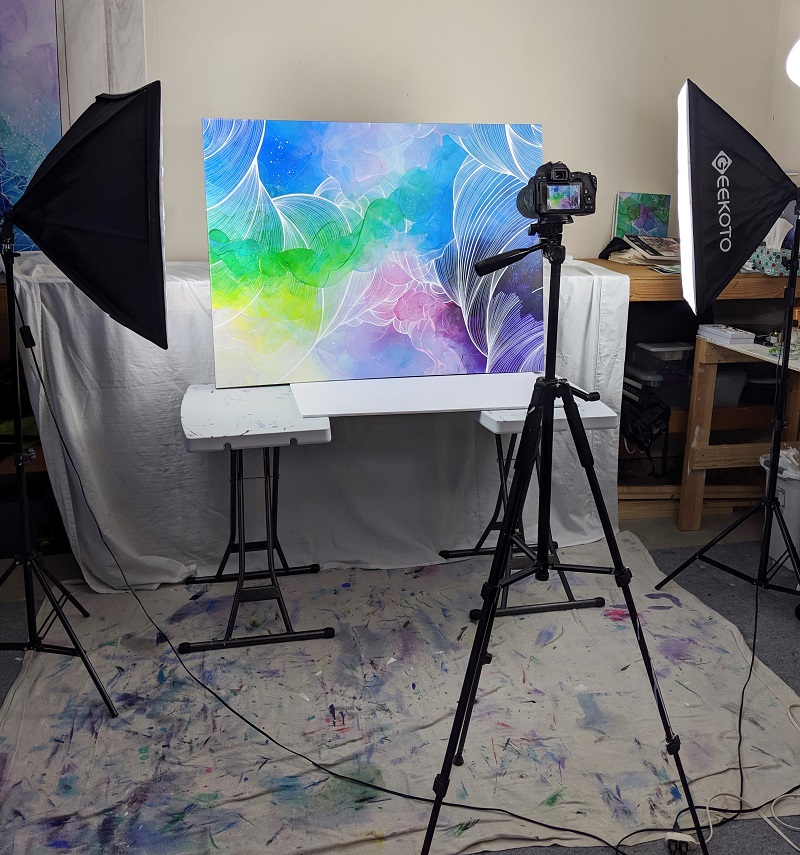
This piece of art is 36″x48″ inches and I need to make 8″x10″ and 11″x14″ prints. (My prints are available for sale in my online store.)
Here is how I set up my photography area:
Position your lights- Place your lights on either side of your work at 45 degree angles. You do not want to put the lights directly in front of the work. When you angle the lights, you reduce/eliminate glare from light bouncing off of textures on the surface.
Place your camera- Put your camera directly in front of the art and position the lens so that the piece fills as much of the viewfinder as possible without cropping your work.

My Camera Settings-
- I do not use flash. (Glare is the enemy!)
- I set the camera to auto (because I don’t know cameras at a photographer’s level).
- I set the camera to take the largest jpeg photos. (I do not shoot in RAW–again, because I’m not a photographer and suck at editing RAW photos.)
- I set the 2 second timer. (Holding and shooting increases the chance of a blurry photo.)
- I press the button (or touch the screen on this camera), step back, and then wait 2 seconds for the camera to shoot.
I usually take 5-10 photos just to be safe and them pop the SD card into my laptop for editing.
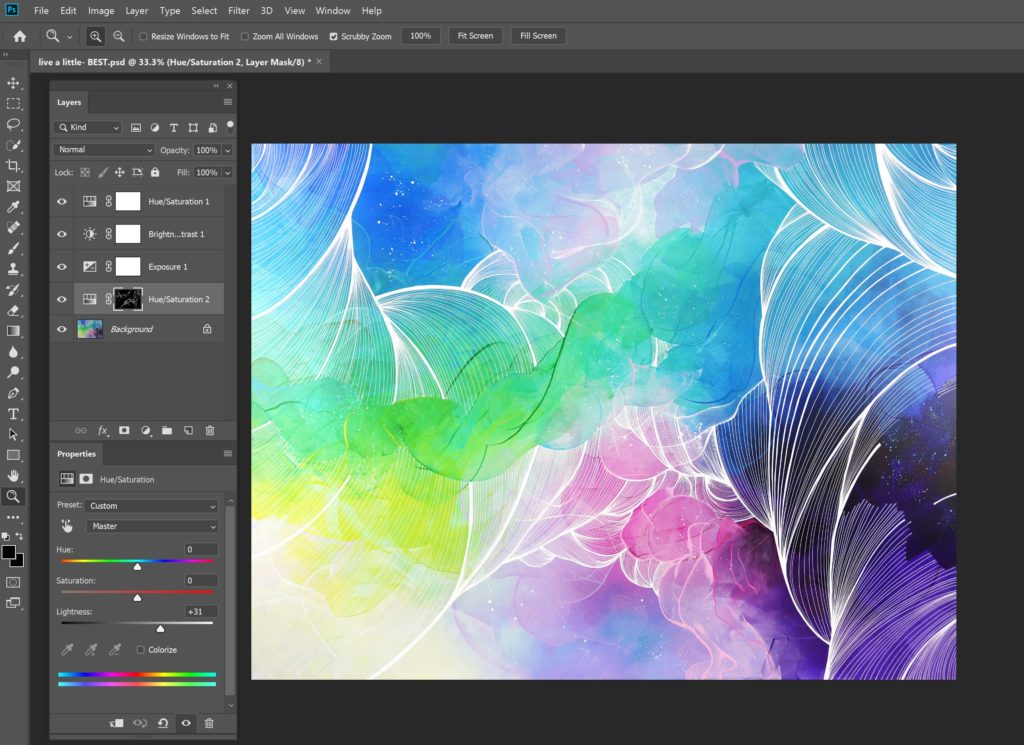
How I edit my photos:
I use Adobe Photoshop. I don’t use most of the features Photoshop offers, so I bet you can get away with using different photo editing programs. Even when you have great lighting and equipment, you’re still going to have to tweak your photos for printing. You can see my unedited photo on the left and my final print file on the right below to see how I had to adjust the image.
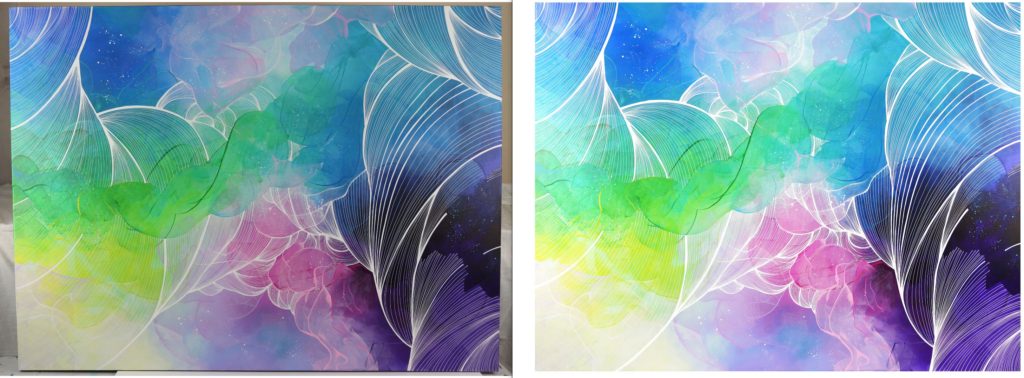
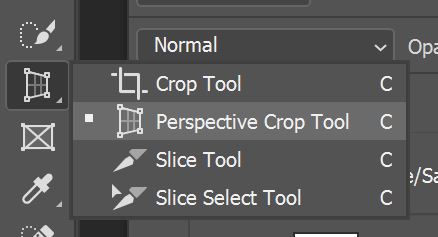
When I open a photo in Photoshop, I start by cropping using the Perspective Crop Tool. If my camera wasn’t in the perfect position, this tool makes sure I retain every bit of the art as I can in the photo.
Next, I make a few edits by adding new Adjustment Layers. First, I tweak the exposure. Then I amp up the brightness and contrast. Since images don’t look the same on paper as they do on screens, I find I have to brighten things up more than I’m comfortable with in order to get an accurate print. (This is especially true if you print using the Canon Pixma Pro 10 like I do.) (Read more about how I make my art prints at home.) Then, I tweak hue and saturation to make sure my colors are as vibrant as the original piece when viewed in daylight.
Next, I export the file as a jpeg. When you are exporting, you can resize the image and make it bigger where Photoshop’s software will add more pixels according to what it thinks new pixels should look like. It’s not perfect–but it could be a solution to going big without access high megapixel camera.
Next, I run a 5″x7″ proof on my printer to see how I did. If you don’t have a printer and plan on sending files to a print shop, I really encourage you to get proofs made. After over a year of making prints, I usually tweak my proofs at least once before printing my full run. When I was still figuring out my printer, I easily went through 5-8 proofs before being happy with the final file, and now I usually do 3 proofs.
Every computer screen will look different and every printer handles ink differently, so don’t expect perfection immediately. Once I’m happy with my image file, I print, sign, package, and put the prints in my shop.
Easy peasy 😉
***
I hope this post was helpful. If you are considering making prints, definitely read my full printer post for more advice and things to think about.
Please leave questions and comments below while commenting is open or reach out to me directly through Instagram or email. I’d love to hear from you! Make sure to sign up for my email list below to never miss a blog post.
-Kelly
P.S. You probably know by now that I am here to help artists with these posts. If you need help with your online branding, Instagram account, or just want a creative accountability coach, then check out my consulting services. You can easily add a session to my online calendar now.