If you just read my last post about starting an online store as an artist, you may have questions about how to photograph your work. When you are preparing your art to sell, it is crucial that you capture your pieces in the best lighting.
Have you ever looked at Etsy listings online with blurry, poorly lit photos? I think we all have. Now, have you ever purchased one of those items? Probably not.
If you are just starting out, you likely don’t have a huge budget to hire a photographer or buy all the equipment yourself. I’m still in that position, so I’m going to show you my setup to take cheap, but quality photos to list on my online store.
*Product Links in this post are affiliate links and I will earn a commission if you make a purchase*
My Mini Photoshoot Setup
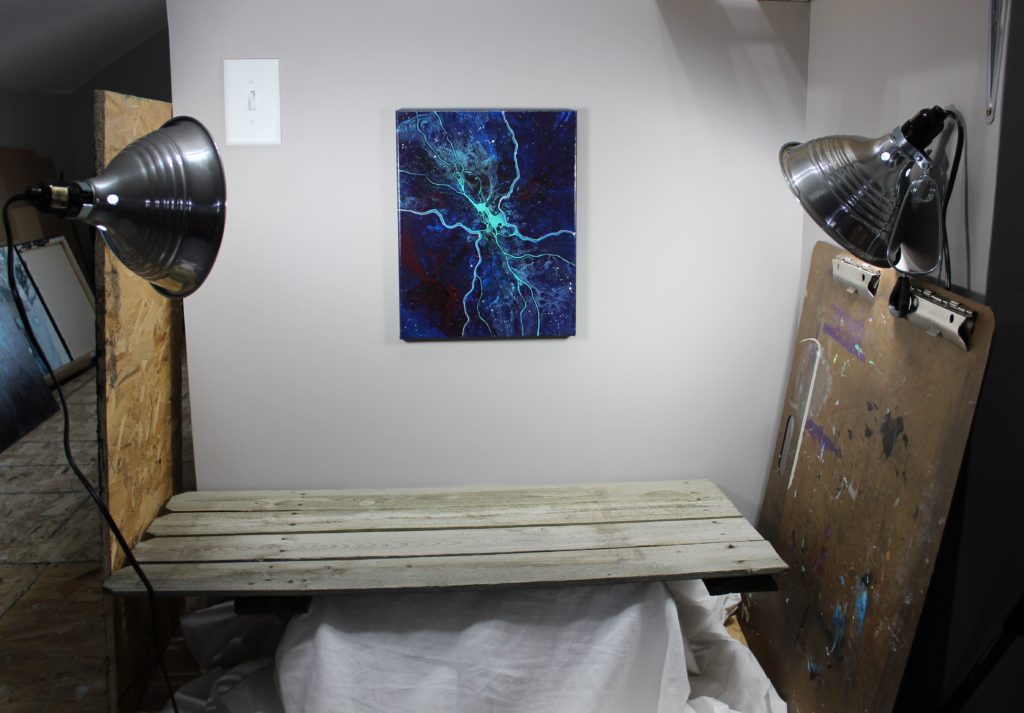
As you can see, this setup is nothing professional. I have lights awkwardly clamped to plywood and an old drawing board and a chunk of fence panel from my backyard. You know, for that rustic vibe.
Diffused lighting from light boxes is the best for photographing artwork, but as long as I don’t have reflections or glare on my pieces, I’m happy with my improvised setup.
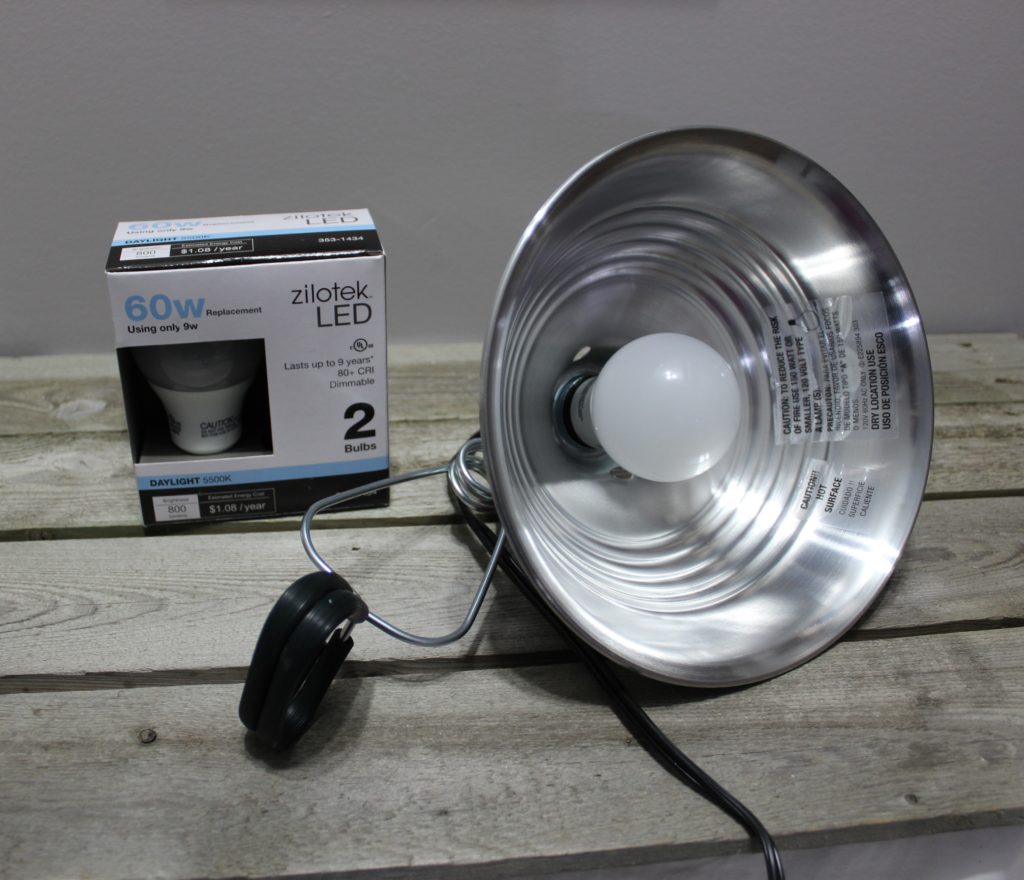
What you will need:
- 5000k daylight bulbs ($5-$15)
- Clamp lights (around $9 each)
- Camera or smartphone ($60-$500)
- A tripod if you want one (I don’t use one for inventory photos, but I do for art prints.)
- Random things to clamp your lights to
- A neutral-colored wall or backdrop
- A clean area to stage your art
Lighting Basics
Lighting is seriously the most important part of photographing your art. I can’t say that enough. If your lighting sucks, even the best camera won’t be able to help you much.
Basic Art Photographing Tips:
- Make sure you have daylight bulbs! You will see in the examples I’ve posted below, but regular warm 60-watt bulbs do nothing positive for your art.
- I place lights on either side of my photo area, plus have daylight bulbs in all of my art studio light fixtures.
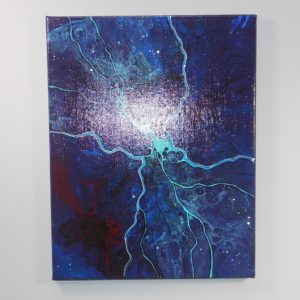
- Angle your lights at roughly 45 degrees to your art. Don’t shine anything directly on your art. Especially if you use a gloss finish of any kind. If you see glare, move the lights around.
- Don’t use flash! Flash is bad. For example, this is what direct lighting or a flash looks like:
Art Staging for Photos
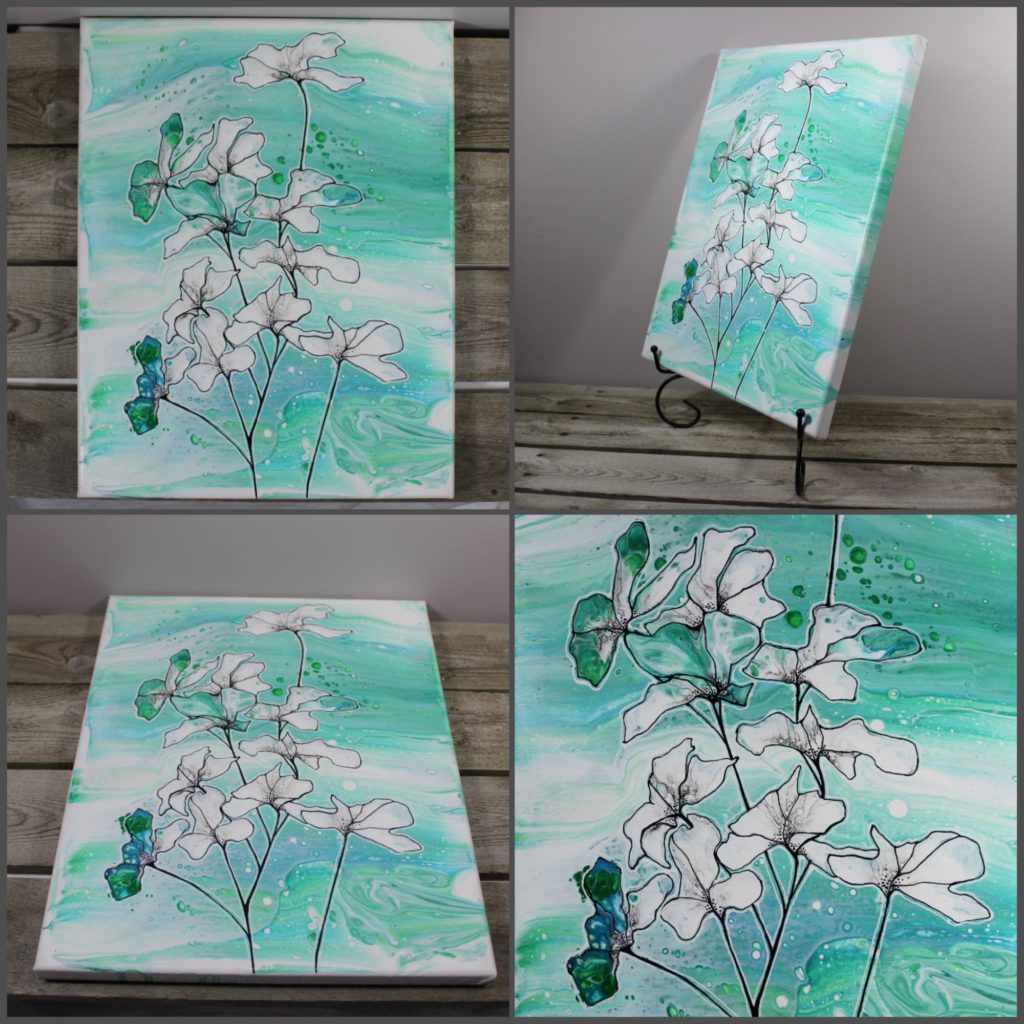
If you are photographing your work to upload into a store, make sure to get multiple photos of your work. Since your customer can’t pick up the item and inspect it, you have to do the work for them.
I usually photograph every piece at multiple angles plus include a close-up of the details like the examples below.
Tips for staging:
- Again, make sure you use a neutral background
- Use easels or hang art on the wall
- Incorporate household decor like flowers, vases, books, etc. to help your customer visualize how they can display their art (I don’t do this yet–I like a simple display.)
Editing Photos:
Even when everything in your studio is set up with great lighting, you should still plan to tweak your photos to get them to match real life. I use Lightroom or the basic Windows photo editor to make minor changes. I really only adjust my brightness and crop my photos for uniformity. If the colors are drastically off in my camera, then I make more intense edits.
I actually have slight panic attacks about my images not accurately representing my art and then customers getting mad at me (thanks anxiety!), so I usually have the art nearby as I’m editing to make sure things match. I still can’t account for what my art looks like on someone else’s device, but my anxiety just needs to deal with that lack of control and chill out.
Things to consider while editing:
- Different screens have different color settings, so if you are changing anything with your saturation, tint, or any color setting make sure to check how the photo looks on another device.
- Pro tip: If you are mindful of blue light when using devices and turn on a blue light filter during the evening (it’s great for sleep hygiene, but gives your screen an orange hue), make sure you don’t edit photos during that time… lesson learned…
Camera Examples
Okay, so now to cameras. Basically, you need something with enough megapixels to give you detailed photos–which is basically every camera now.
I have three cameras on hand. My Samsung Galaxy phone, a Nikon Point and Shoot, and a Canon DSLR. I love my DSLR, but it might be out of a beginner’s price range so I wanted to show you how lighting differences look between all three.

I’m going to include lighting samples from a standard warm-lit room (bad), a sunny day outside (way better), and inside with daylight bulbs (best, because you can control the lighting). I want to note that I spent time out in the snow to capture some of these photos. I hate winter, but I did it in the name of art!
Also, I haven’t altered these photos at all beyond cropping.
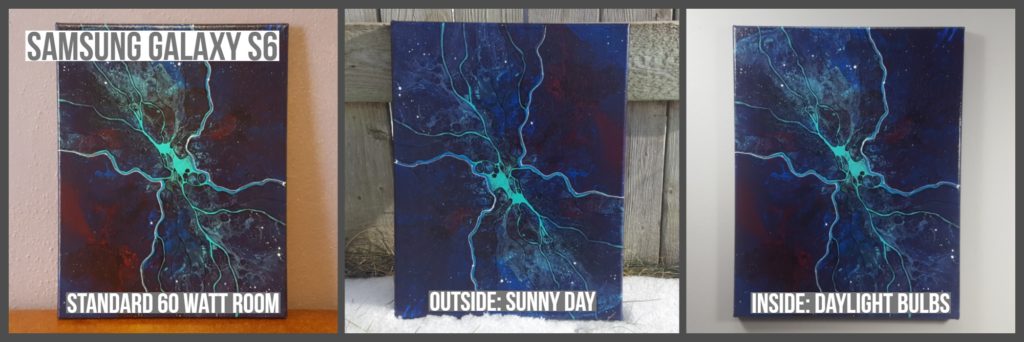
Samsung Galaxy S6 | 16 megapixel
Price: Roughly $300 as of this post
Conclusion: Photos are a bit dull. I would definitely increase the brightness while editing and increase the contrast a bit.
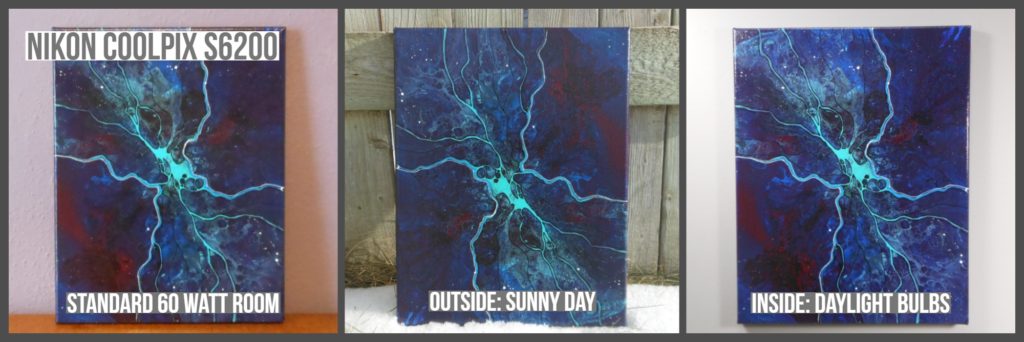
Nikon Coolpix S6200 | 16 megapixel
Price: $100 for similar new model
Conclusion: Not the worst camera. I don’t like the delay between pushing the button and the photo actually being taken since it increases the likelihood of a blurry photo (use a tripod in cases like this), but the quality on the daylight bulb photo is pretty good. You can see it’s way better than the Galaxy.
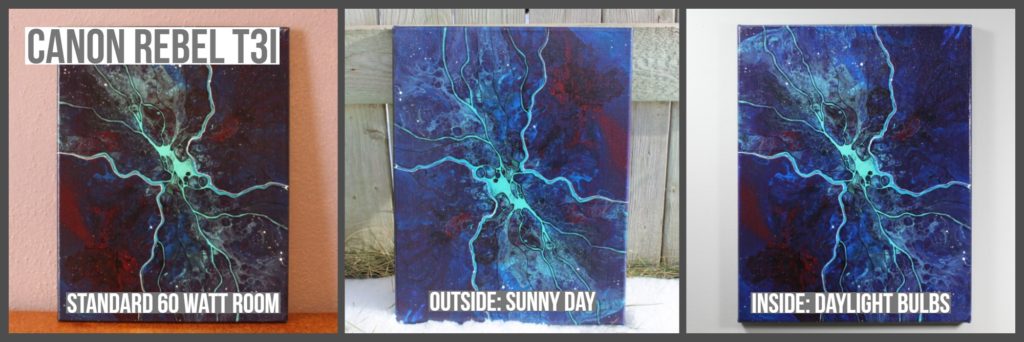
Canon Rebel T3i | 18 megapixel
Price: $375-$500 depending on deals and bundles. The T3i has been discontinued but the Rebel T6 has some pretty decent deals. (Bundle or camera and lens only) As of 2019, I use a Canon SL2.
I love my Canon DSLRs. I still usually bump up the brightness a bit, especially on my darker pieces, but the pictures really don’t need much editing.
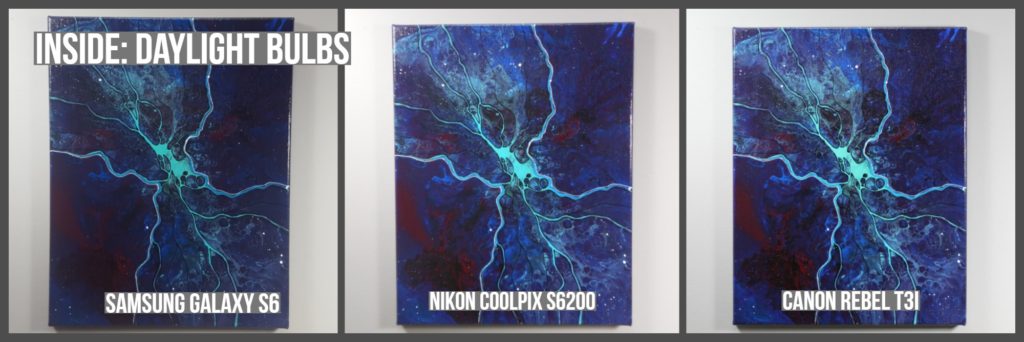
Daylight Bulb Comparison of All Three Cameras
Looking at this, the Nikon and Canon options are pretty similar. Canon is just a smidgen darker, but the Galaxy is definitely the worst option, but all new smartphone models coming out have some pretty amazing cameras.
Please leave questions and comments below while commenting is open or reach out to me directly through Instagram or email. I’d love to hear from you! Make sure to sign up for my email list below to never miss a blog post.
-Kelly
P.S. You probably know by now that I am here to help artists with these posts. If you need help with your online branding, Instagram account, or just want a creative accountability coach, then check out my consulting services. You can easily add a session to my online calendar now.
This is a great article!
Thank you!